How to Order Custom Caps in Australia: A Step-by-Step Guide
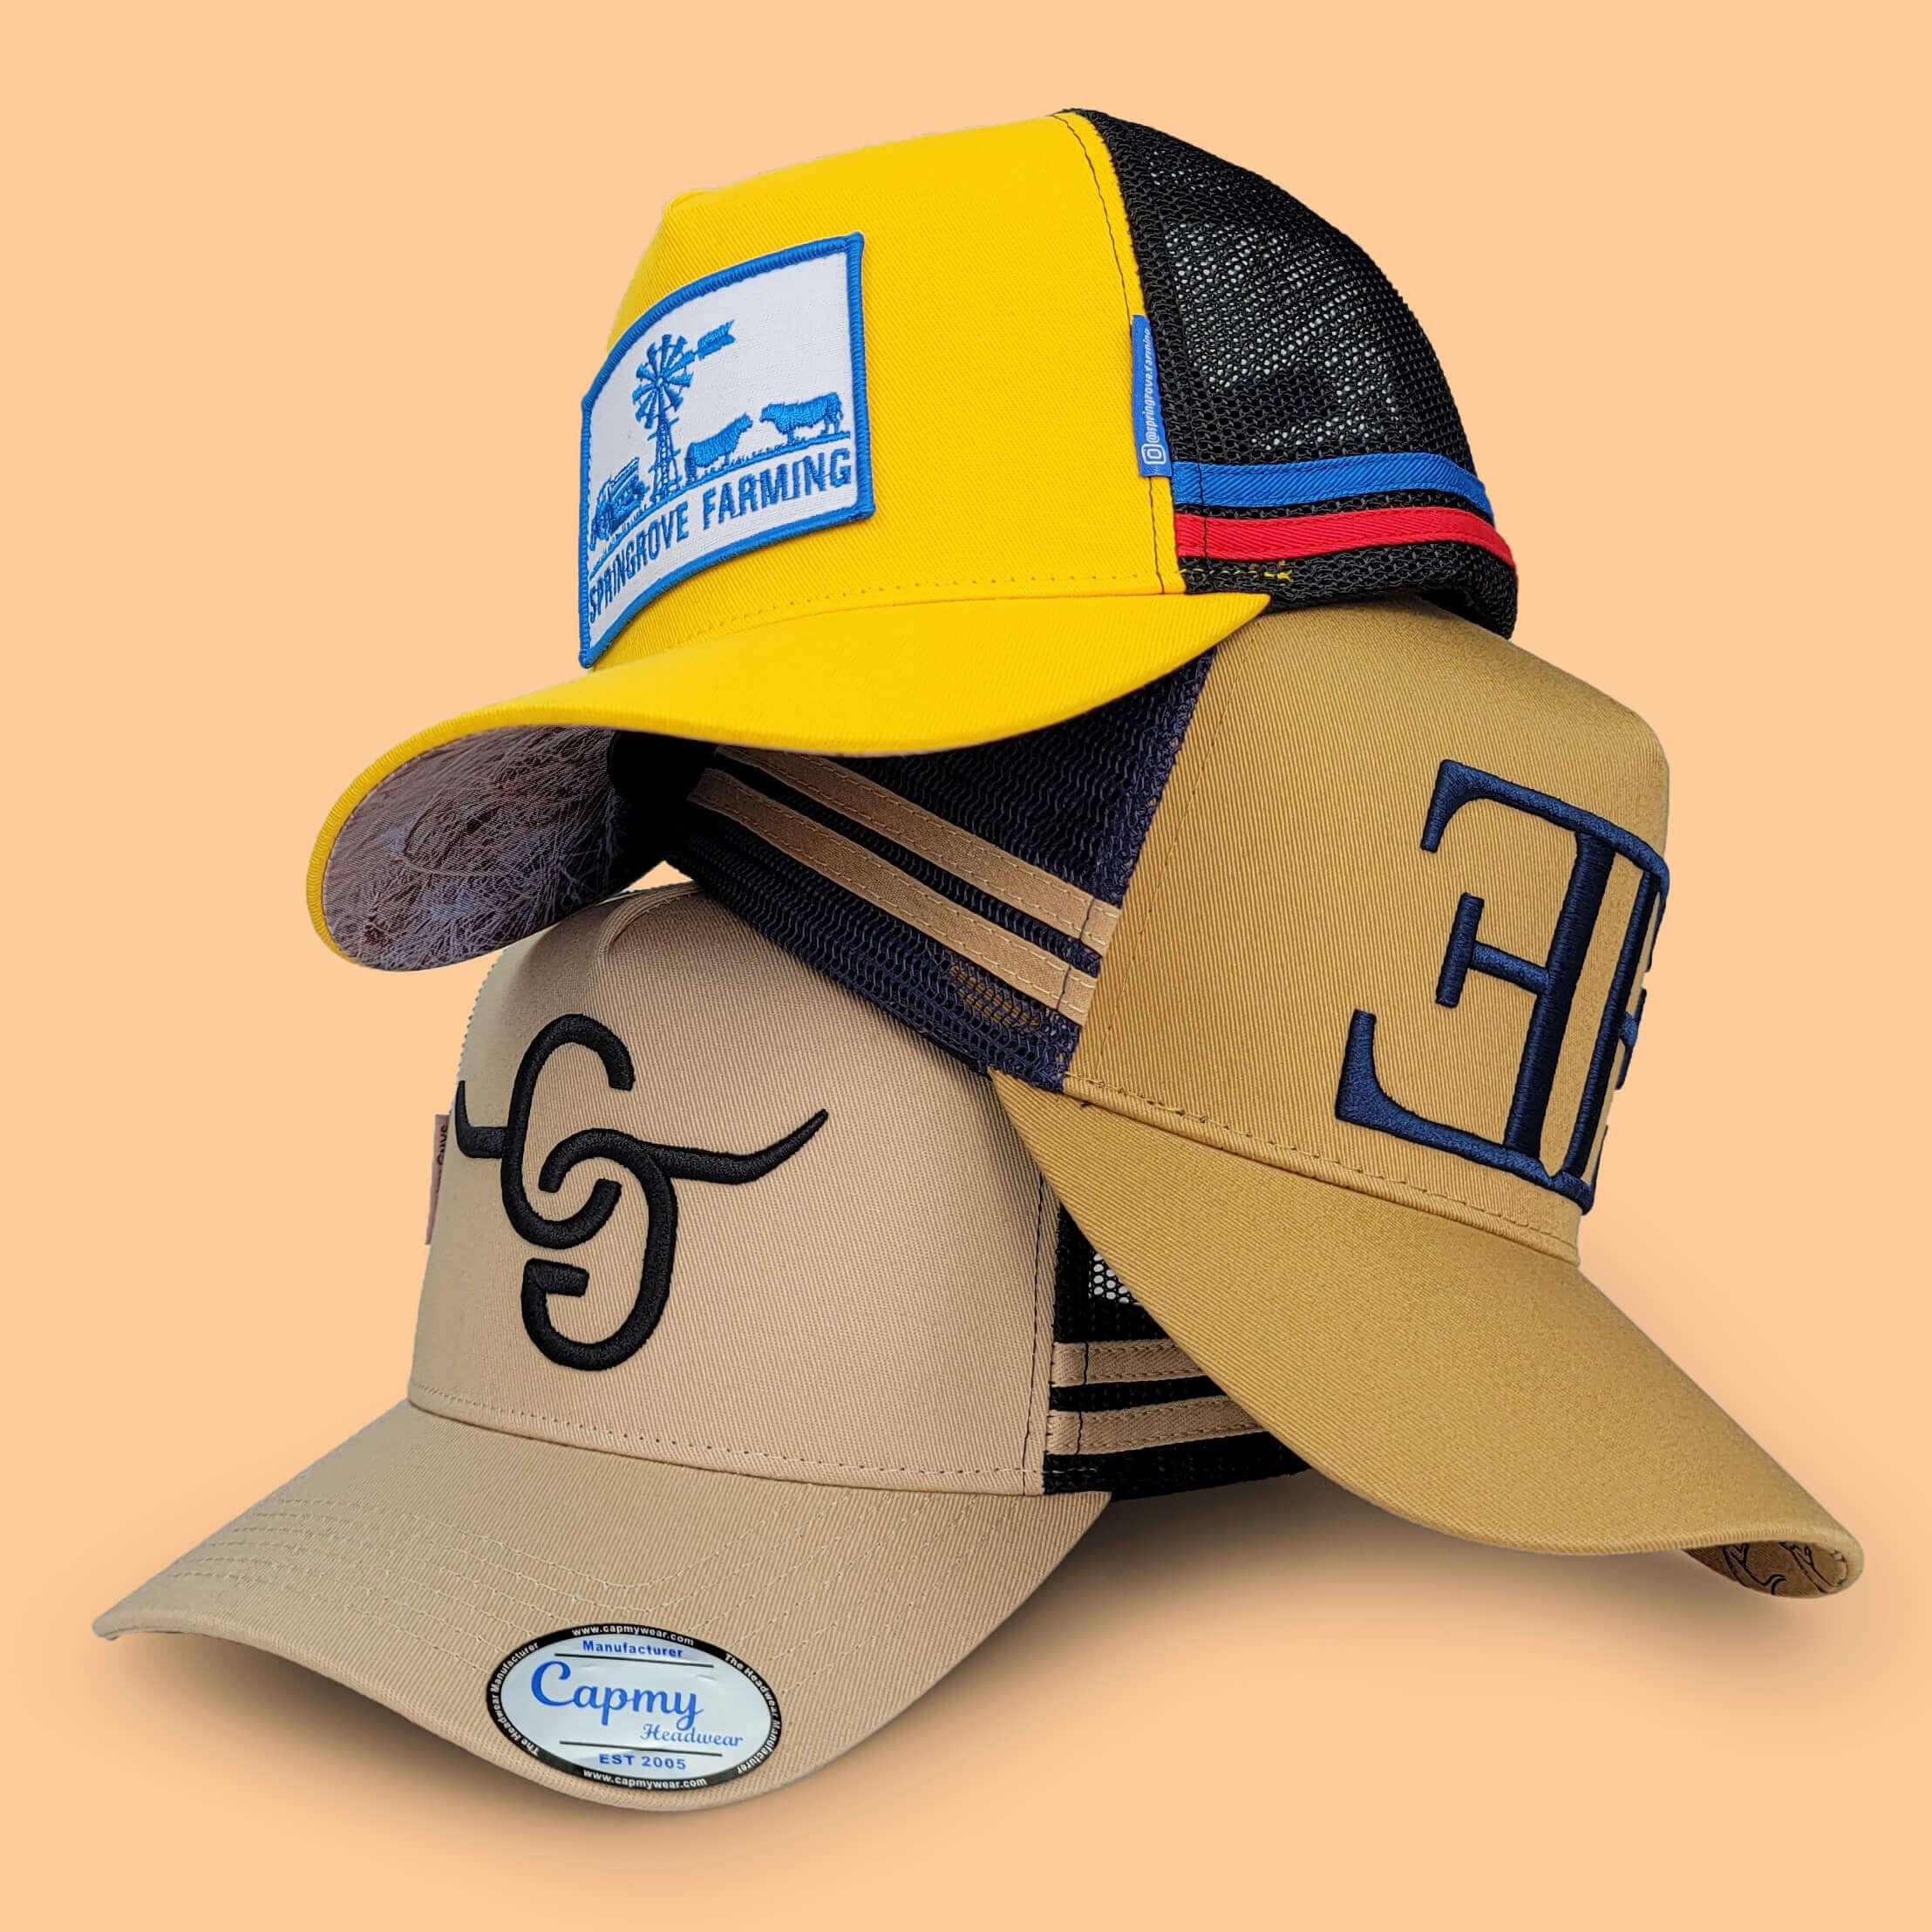
Ordering custom caps in Australia comes down to eight decisions: your purpose and quantity, cap style, fabric and fit, decoration method, artwork, quote, proof approval, and delivery. Get each one right in order and the process is quick, the cost is predictable and the caps arrive looking the way you pictured them.
Custom caps are one of the most useful pieces of branded headwear you can buy. They give sun protection in an Australian climate, they suit almost every age group, and they carry your logo into places a business card never reaches. Businesses use them as staff uniforms, clubs use them for team identity, and brands sell them as merchandise.
This guide walks you through the full ordering process, from the first idea to the box landing on your doorstep. It is written for:
-
Business owners and office managers ordering staff or promotional caps
-
Sports clubs, schools and community groups outfitting members
-
Event organisers planning giveaways or volunteer headwear
-
Startups and online brands launching their first merchandise line
Step 1: Define Your Purpose, Audience and Quantity
Start by deciding what the caps are for, because purpose drives every later choice, from style to decoration to budget. A cap handed out free at a trade show has different needs than one worn eight hours a day on a worksite.
Ask yourself these questions before contacting any supplier:
-
What is the goal? Staff uniform, promotional giveaway, retail merchandise, team or club identity, or a gift
-
Who will wear them? Adults, kids, a mix of ages and head sizes, or a specific trade or sport
-
Where will they be worn? Outdoors in full sun, in a kitchen or warehouse, at events, or as casual streetwear
-
How many do you need? A single sample, a small run of 12 to 50, or a bulk order of several hundred
-
What is your budget per cap? Set a realistic range so you can compare quotes fairly
-
When do you need them? Work back from your event or launch date and add a buffer
Quantity matters more than most buyers expect. Many Australian suppliers set minimum order quantities, and the price per cap usually drops as the order grows because setup costs are spread across more units. If you are unsure of exact numbers, a good rule is to order a few extra above your headcount to cover new starters, replacements and sizing mistakes.
Write it down. A short brief with your purpose, quantity, budget and deadline makes quote requests faster and helps you compare suppliers on equal terms.
Step 2: Choose Your Cap Style
Pick the style that matches your wearers and your brand, because the cap's shape decides how your logo sits and how the cap feels in use. Here are the styles Australian buyers order most often:
-
Baseball cap (6-panel): The classic. Six stitched panels, a curved peak and a structured front that holds a logo well. A safe choice for almost any group.
-
Dad cap: An unstructured, relaxed cap with a curved brim and an adjustable strap. Comfortable, casual and popular for hospitality and lifestyle brands.
-
Trucker cap: A structured foam front with a mesh back. The mesh adds airflow, which suits hot weather and outdoor work.
-
Snapback: A flat or slightly curved brim with a plastic snap closure. A streetwear favourite, and a strong pick for merchandise and fashion brands.
-
5-panel cap: A flatter, low-profile look with a seamless front panel, which gives a clean canvas for larger logos.
-
Bucket and wide-brim hats: Not caps, but worth considering where sun protection for the neck and ears matters, such as on farms, building sites and school sports days.
Check these details as you compare:
-
Brim shape: Curved brims suit everyday wear and a traditional look. Flat brims suit a modern, streetwear style.
-
Structure: Structured caps hold their shape and show logos crisply. Unstructured caps are softer and more casual.
-
Closure: Snap, strap-back and Velcro closures adjust to most heads. Fitted caps look sharp but need exact sizing.
-
Panel count: More panels mean more seams, which can affect where you place embroidery.
A practical tip: If your team is large or varied, choose an adjustable style. It removes most sizing headaches and works for adults of different head sizes.
Step 3: Pick Fabric, Colours, Fit and Sizing
Choose a fabric that suits the conditions the cap will face, then lock in colours and fit. A cap that looks great but feels hot or sits badly will end up in a drawer.
Common cap fabrics:
-
Cotton twill: Soft, breathable and the standard for embroidered caps. A reliable all-rounder for everyday wear.
-
Polyester: Lightweight, quick-drying and resistant to sweat. A good choice for sport and outdoor crews.
-
Brushed or heavy cotton: A thicker, more premium feel for retail merchandise and winter wear.
-
Mesh back panels: Added airflow on trucker styles, which helps in hot Australian summers.
-
Recycled or eco fabrics: Increasingly available if sustainability matters to your brand or customers.
Choosing colours:
-
Match your brand: Start with your logo colours and pick a cap colour that contrasts with them so the logo stays readable
-
Think about wear and tear: Darker caps hide sweat marks and dirt. White and pale caps show them quickly.
-
Consider thread and print colours: A navy logo on a black cap disappears. High contrast wins.
-
Keep it simple: Two or three colours usually look sharper and cost less than a busy design
Fit and sizing:
-
One size fits most: Adjustable straps and snaps cover most adult head sizes. This is the usual choice for bulk orders.
-
Fitted caps: Sized, usually in small, medium and large. They look neat but need accurate measurements.
-
Youth sizes: Many styles come in kids' sizes, which is useful for schools, junior clubs and family events.
-
Order a sample: If you can, check one cap in hand before placing a large order. It is the surest way to confirm fabric, colour and comfort.
Sun protection note: If staff or members work outdoors, look at the cap's brim length and consider a style that shades the face well. Caps with a longer brim or legionnaire flap add protection for the neck and ears.
Step 4: Choose a Decoration Method
Match the decoration method to your logo and your budget, because the same artwork can look very different stitched, printed or applied as a patch. Most Australian suppliers offer several options.
Flat embroidery
-
Thread stitched directly into the cap for a durable, professional finish
-
Best for logos, text and simple designs with limited colours
-
Holds up well to sun, sweat and repeated washing
-
Works on most structured caps
3D puff embroidery
-
Foam placed under the stitching so the logo stands out from the cap
-
Best for bold, simple shapes and short text such as initials or a single word
-
Gives a strong, premium look on streetwear and merchandise
-
Not suited to fine detail or very small text, which can blur
Woven or embroidered patches
-
A separate patch sewn or heat-applied to the cap
-
Best for intricate logos, many colours or a badge look
-
Useful when the cap's seams would distort direct embroidery
-
Adds a little cost but allows more detail
Heat transfer and screen printing
-
A printed design applied to the cap surface
-
Best for photographic or multicolour artwork, or gradients that stitching cannot reproduce
-
Can feel flatter and may wear sooner than stitching on caps that are washed often
Leather and rubber patches
-
A raised, tactile patch with a rugged or premium look
-
Popular for outdoor, workwear and lifestyle brands
How to decide:
-
Simple logo, one to three colours: Choose flat embroidery
-
Bold shape or short text, premium feel: Consider 3D puff
-
Detailed or many-coloured artwork: Use a patch or a print
-
Daily wear and frequent washing: Favour embroidery for durability
Where to place the decoration:
-
Front centre: The standard position and the most visible
-
Side or back: Good for a secondary logo, a website address or a slogan
-
Under the brim or on the strap: A subtle extra detail for special editions
Ask your supplier to confirm the maximum decoration area for your chosen cap, as it varies by style.
Step 5: Prepare Your Logo and Artwork Files
Supply clean, high-quality artwork before you request a proof, because poor files are the most common cause of delays and disappointing results. A sharp logo gives the supplier something accurate to work from.
Best file formats:
-
Vector files (AI, EPS, SVG, PDF): The ideal format. Vector artwork scales to any size without losing sharpness.
-
High-resolution PNG: Acceptable if a vector file is not available, especially with a transparent background
-
JPEG or low-resolution images: Avoid where you can. Blurry edges and solid backgrounds make stitching and printing harder.
Artwork checklist:
-
Use clean outlines: Sharp edges and clear shapes digitise and print best
-
Limit colours: Fewer colours mean a simpler setup and a more consistent finish
-
Avoid tiny text: Very small lettering can fill in when stitched. Keep text bold and legible at cap size.
-
Check the size: Front cap logos are usually small, so test your design at that scale before you commit
-
Confirm brand colours: Provide Pantone references or exact colour codes if colour accuracy matters
-
Include a transparent background: This lets the supplier place the logo cleanly on any cap colour
Embroidery needs digitising. Stitched logos are converted into a stitch file, a process called digitising, which tells the embroidery machine where and how to sew. Many suppliers include digitising in the quote or charge a one-off setup fee. If you reorder the same design later, the file is usually reused, so it is worth asking how it is stored.
No logo yet? Some suppliers offer design help, mockups or artwork clean-up for a fee. If you are starting from scratch, a simple, bold design will give the best result on a cap.
Check your rights. Only submit artwork you own or have permission to use. Suppliers may decline designs that use protected logos or brand names.
Step 6: Request a Quote and Understand Pricing
Ask for a written quote from at least two or three Australian suppliers, and give each the same brief so the prices are comparable. A clear quote request gets a faster, more accurate reply.
What to include in your quote request:
-
Cap style, colour and fabric
-
Quantity and any size requirements
-
Your logo file and the decoration method you want
-
Logo placement, such as front, side or back
-
Your delivery postcode and your deadline
What affects the price:
-
Quantity: Bigger orders reduce the cost per cap
-
Cap style and quality: Premium fabrics and structured styles cost more than basic ones
-
Decoration method: 3D puff, patches and multi-position decoration usually cost more than a single flat embroidered logo
-
Number of colours or stitches: More thread colours and larger designs increase embroidery cost
-
Setup or digitising fees: Often a one-off charge for new artwork
-
Rush production: Tight deadlines can add a premium
-
Delivery: Freight depends on volume, location and speed
Check the details in the quote:
-
GST: Confirm whether prices are shown including or excluding GST
-
Minimum order quantity: Ask whether your order meets it, and what happens if it does not
-
Setup fees: Find out what is included and what is extra
-
Proof and sample policy: Check whether a proof or physical sample is included, and what it costs
-
Turnaround time: Get an estimated production time in writing
-
Reorder terms: Ask whether your digitised file is stored and what a repeat order costs
Compare quotes on value, not only price. The cheapest quote can hide setup fees, weaker fabric or slow turnaround. Look at quality, communication, local support and the supplier's experience with caps.
Small orders are possible. Some Australian suppliers accept low minimums for sample runs, club orders or small businesses. If you only need a handful, ask before assuming you must order in bulk.
Step 7: Approve Your Mockup or Proof
Review the proof carefully and approve it only when every detail is correct, because production starts once you sign off and mistakes after that point are hard to fix. This is your last chance to catch problems cheaply.
What a proof usually shows:
-
Your logo placed on the chosen cap colour
-
The size and position of the decoration
-
Thread or print colours
-
Any text, spelling and spacing
What to check before approving:
-
Spelling and numbers: Read every word, phone number and web address twice
-
Logo accuracy: Confirm shapes, proportions and colours match your brand
-
Placement and size: Make sure the logo is centred and sized well for the cap's front panel
-
Cap details: Verify the style, colour, fabric and quantity listed on the order
-
Colour matching: Remember that a screen mockup can differ slightly from real thread or ink colour. Ask for thread codes or a physical sample if exact colour matters.
-
Quantities and sizes: Confirm the numbers by style, colour and size if your order is mixed
Ask about samples. For large or high-stakes orders, a physical sample or stitch-out lets you see and feel the real result. Many suppliers charge for this, but it can save a costly mistake across hundreds of caps.
Get approval in writing. Reply to the proof by email or through the supplier's system so there is a clear record of what you approved. If you spot an issue, request a revised proof and wait for the updated version before giving the green light.
Do not rush this step. A few extra minutes on the proof is far cheaper than reordering a batch with a typo.
Step 8: Production, Delivery and Quality Check
Plan for production and delivery time from the day you approve the proof, and check the caps as soon as they arrive. Turnaround varies by supplier, order size and how busy the season is, so always get an estimate in writing.
Production time:
-
Standard orders: Many suppliers quote a few working days to a couple of weeks after proof approval, depending on volume and stock
-
Busy periods: Expect longer lead times in the lead-up to Christmas, the end of the financial year and major sporting seasons
-
Rush options: Some suppliers offer express production for an extra fee. Ask early, since availability depends on their schedule.
-
Stock availability: Confirm that your chosen cap style and colour are in stock, since back-orders can add days or weeks
Delivery within Australia:
-
Freight method: Orders usually ship by courier or Australia Post, and larger orders may arrive on a pallet
-
Delivery time: Metro areas are typically faster than regional or remote locations
-
Tracking: Ask for a tracking number so you can plan for arrival
-
Pickup: Some local suppliers offer pickup, which can save freight costs and time
-
Delivery address: Use a staffed address and confirm who will sign for the parcel
Quality check on arrival:
-
Count the caps: Confirm the quantity matches your order, including sizes and colours
-
Inspect the decoration: Check that the logo is sharp, well placed and free of loose threads or puckering
-
Check for defects: Look for fabric flaws, stitching problems and colour differences
-
Compare with the proof: Make sure the finished caps match what you approved
-
Try a few on: Confirm fit and comfort across different head sizes
If something is wrong:
-
Contact the supplier straight away with photos and your order details
-
Keep the packaging and the delivery paperwork
-
Ask about the supplier's return, reprint or replacement policy, which is best confirmed before you order
The Australian Consumer Law gives you rights if goods arrive faulty or not as described, and a good supplier will sort out genuine problems promptly.
Common Mistakes to Avoid
Most problems with custom cap orders come from a handful of avoidable errors. Check this list before you place your order.
-
Using a low-quality logo file: A blurry image produces blurry results. Supply vector artwork or a high-resolution file.
-
Over-detailed designs: Fine lines and tiny text do not stitch well on a small cap front. Simplify the design for the best finish.
-
Poor colour contrast: A dark logo on a dark cap loses impact. Choose contrasting thread or ink colours.
-
Skipping the proof: Approving without reading every detail is how typos end up on 200 caps.
-
Ordering too close to the deadline: Production and freight take time. Build in a buffer, especially in peak seasons.
-
Ignoring minimum order quantities: Check the minimum before you commit to a style, so you are not surprised by an extra fee or a higher unit price.
-
Choosing on price alone: The cheapest quote can come with hidden setup fees, thin fabric or weak support.
-
Forgetting about sizing: If your group includes kids or a wide range of head sizes, choose adjustable or multi-size options.
-
Not asking about reorders: If you may order again, confirm that your digitised file is saved and what a repeat order costs.
-
Overlooking the conditions of use: A cap for a hot outdoor job needs breathable fabric and a good brim. Style alone is not enough.
Quick Ordering Checklist and FAQs
Use this checklist to confirm you have covered every step before you place your order.
Pre-order checklist:
-
Purpose, audience and quantity are decided
-
Budget per cap is set
-
Deadline is confirmed, with a buffer for production and delivery
-
Cap style, fabric, colour and fit are chosen
-
Decoration method and placement are chosen
-
Logo is ready as a vector file or high-resolution image
-
Quotes are requested from two or three suppliers
-
GST, setup fees and minimum order quantities are confirmed
-
Proof is read carefully and approved in writing
-
Delivery address and contact person are confirmed
Frequently asked questions
How long does it take to order custom caps in Australia?
It depends on the supplier, the decoration method and the time of year. Allow time for quoting, proofing, production and freight, and ask your supplier for a firm estimate. Order earlier than you think you need to, especially before Christmas and major events.
What is the minimum order for custom caps?
Minimums vary widely. Some suppliers accept very small runs, while others set higher minimums for particular styles or decoration methods. Ask each supplier before you decide.
Is embroidery or printing better for caps?
Embroidery is usually the better choice for logos and text because it is durable and looks professional. Printing or heat transfer suits detailed, multicolour or photographic artwork that stitching cannot reproduce well.
What file format should my logo be in?
A vector file such as AI, EPS, SVG or PDF is best. A high-resolution PNG with a transparent background is the next best option.
Can I order a sample before a bulk order?
Many suppliers can produce a sample or stitch-out, usually for a fee. It is worth it for large orders, or when exact colour and quality matter.
Can I order custom caps in different sizes or colours in one order?
Often yes, though some suppliers set minimums per colour or style. Ask for a quote that covers the full mix.
Do prices include GST?
Not always. Check whether the quote shows prices including or excluding GST so you can compare suppliers fairly.
What if I need only a few caps?
Ask about low-minimum or small-batch options. Some suppliers handle small orders for clubs, events and startups.
Ready to Order Your Custom Caps?
Ordering custom caps in Australia is straightforward once you work through the steps in order: set your purpose and quantity, choose a style, pick fabric and fit, select a decoration method, prepare your artwork, compare quotes, approve the proof and plan for delivery. A clear brief and a clean logo file save the most time and money.
To get started today:
-
Write a short brief with your quantity, budget and deadline
-
Gather your logo as a vector file or a high-resolution PNG
-
Request quotes from a local supplier that offers embroidery and printing on caps
-
Ask about samples, proofs and turnaround before you commit
With the right preparation, your custom caps will arrive on time, look sharp and carry your brand wherever they go.

 English
 Arabic
 French
 Spanish
 Portuguese
 Deutsch
 Turkish
 Dutch
 Russian
 Romaian
 Portuguese (Brazil)
 Greek